ご挨拶

ツキシマ
こんにちは、ツキシマです。
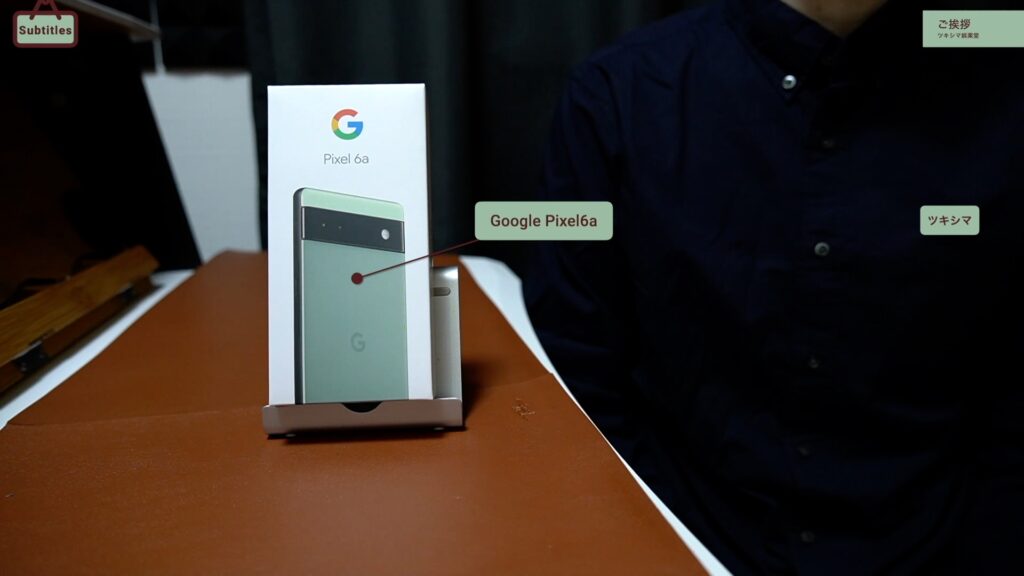
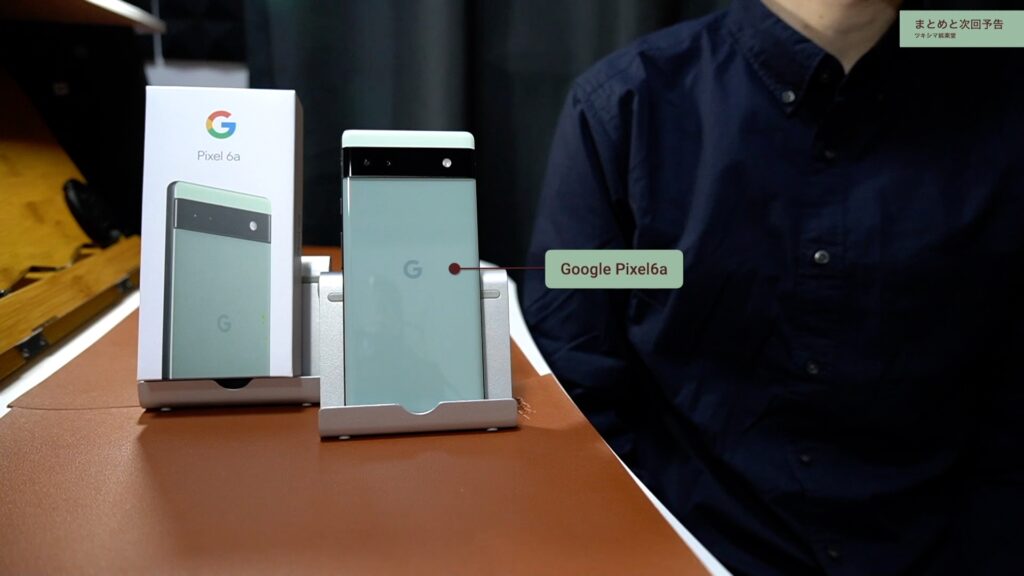
今回は、「Google Pixel 6a」を開封レビューしていきたいと思います。下取りプログラムを利用してGoogleストアより購入しました。
ツキシマ
それでは、開封して内容物を確認していきたいと思います。
開封と内容物の確認
開封
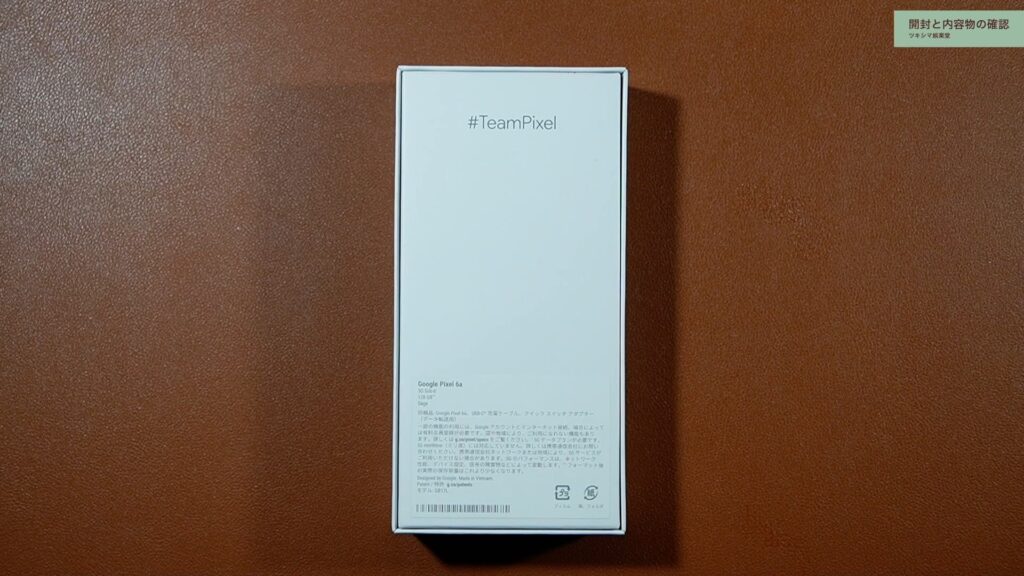
パッケージ表面です。
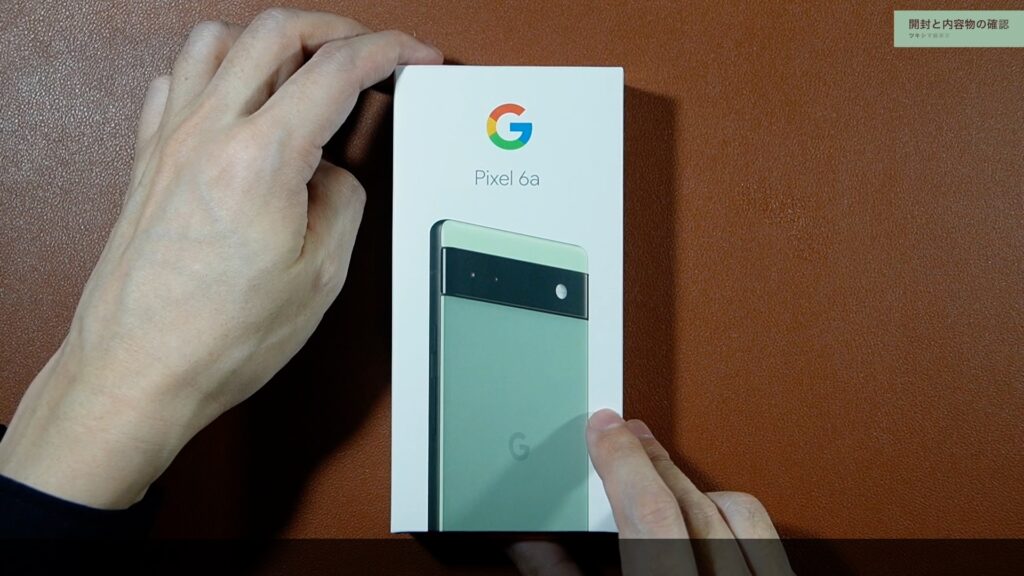
側面です。USB充電器が付属しないので薄いです。
裏面には内容物などが記載されています。
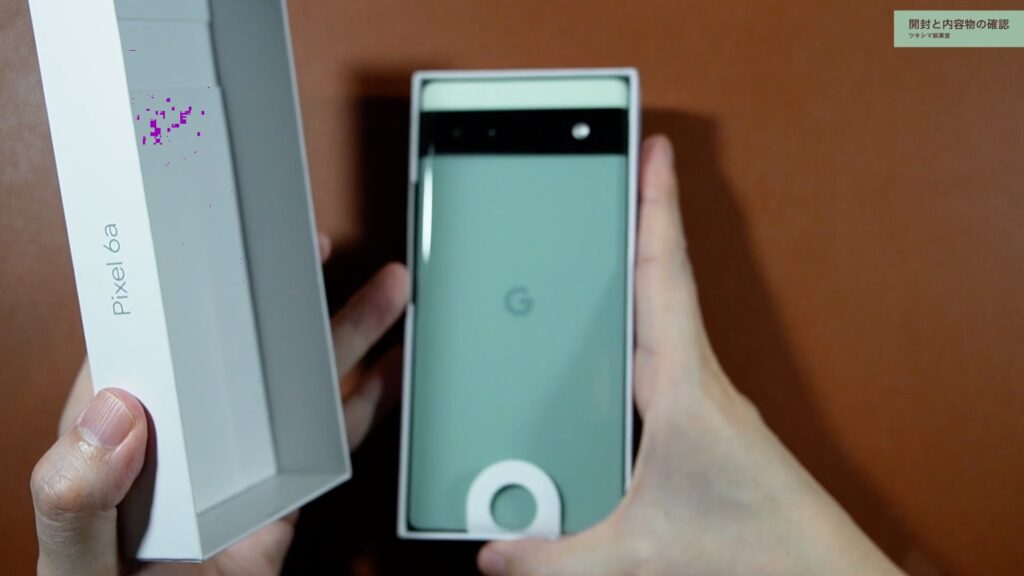
開封していきます。
内容物の確認
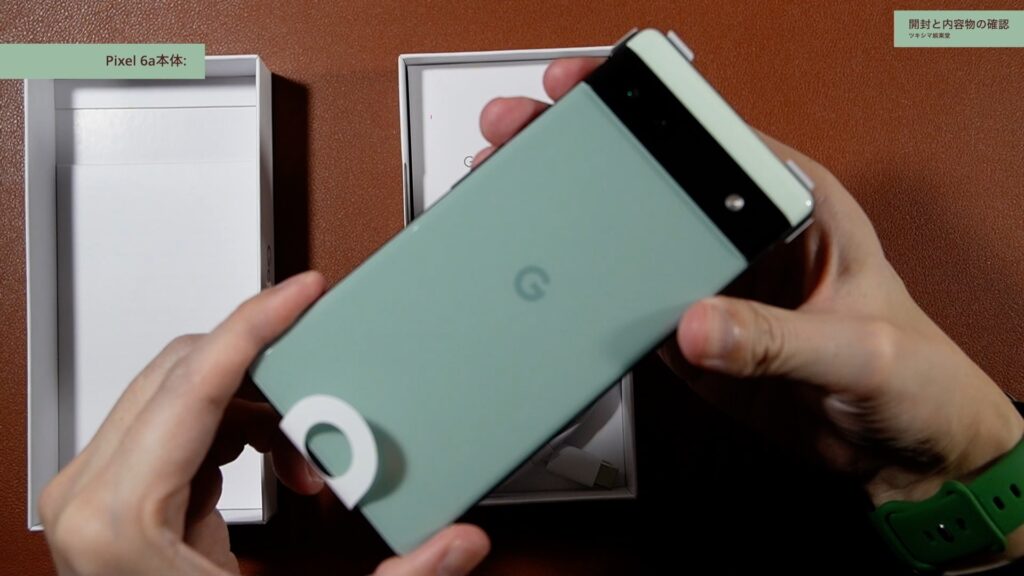
「Pixel 6a」本体です。
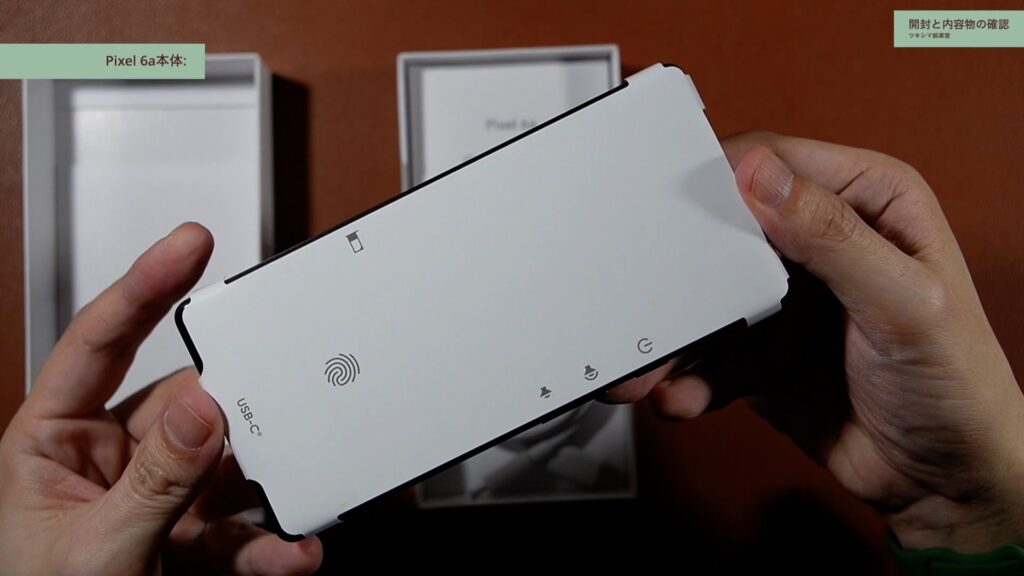
液晶面には保護シートが貼り付けられています。
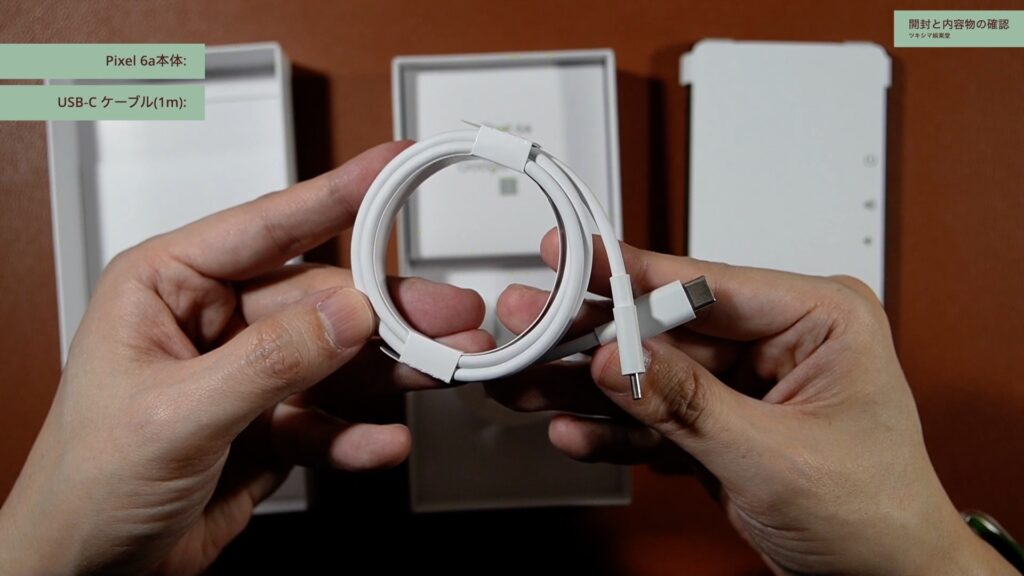
充電用の「USB-C ケーブル」です。長さは1mです。
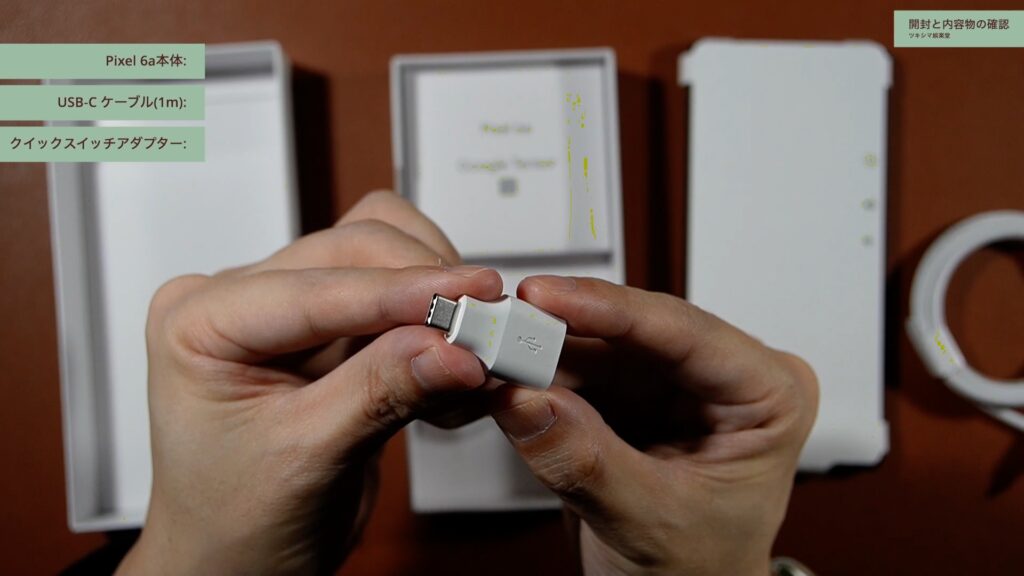
クイックスイッチアダプター(USB変換アダプター)です。
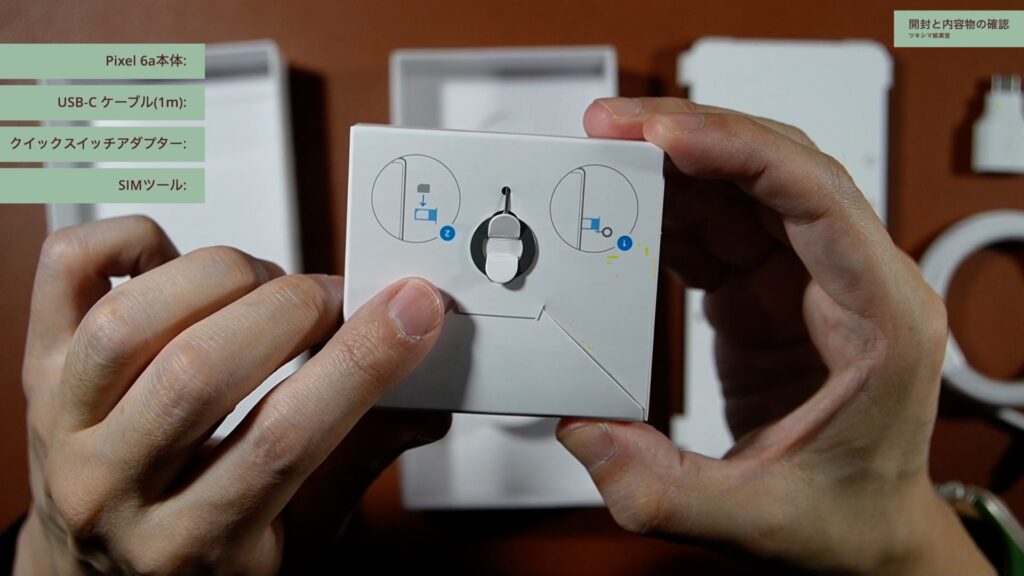
SIMトレイ用のピンです。
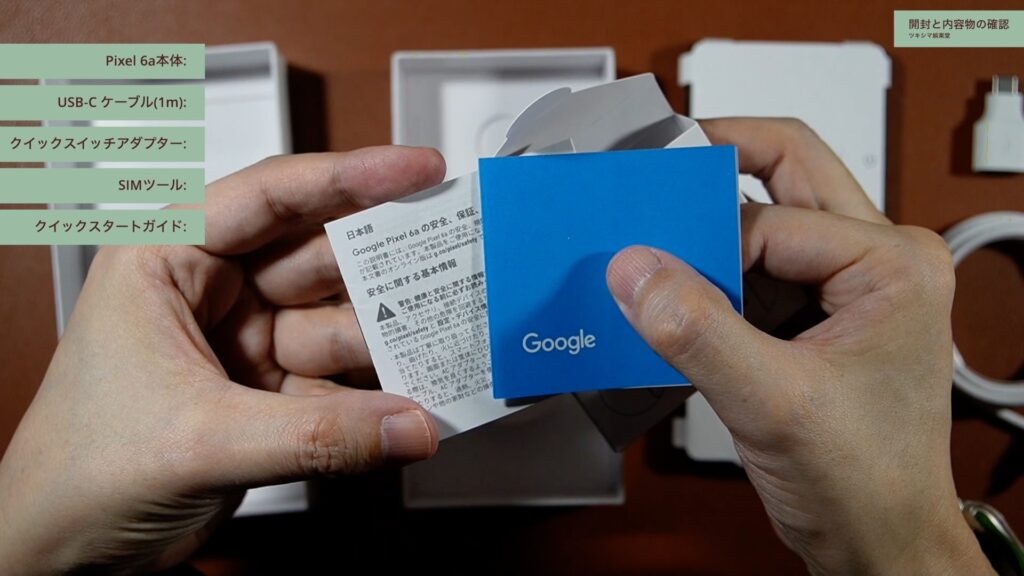
箱の中には、クイックスタートガイドが入っています。
内容物は以上です。
- Pixel 6a本体
- USB-C ケーブル(1m)
- クイックスイッチアダプター(USB変換アダプター)
- SIMツール
- クイックスタートガイド
ツキシマ
次は、主な特徴と仕様をみていきたいと思います。
主な特徴と仕様
プロセッサー
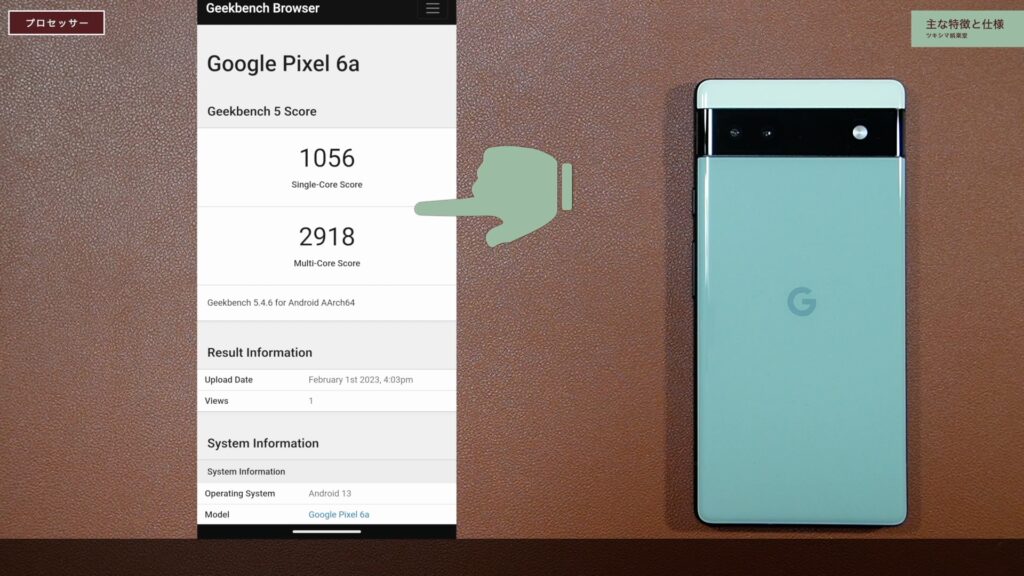
プロセッサー(CPU)は、「Google Tensor」を搭載しています。Pixelは、「スマホ本体・プロセッサー・OS」の3つをGoogleが開発していますので、動作や安定性に期待が持てると思っています。

実際にベンチマークをとってみると、非常に高い数値を記録しています。
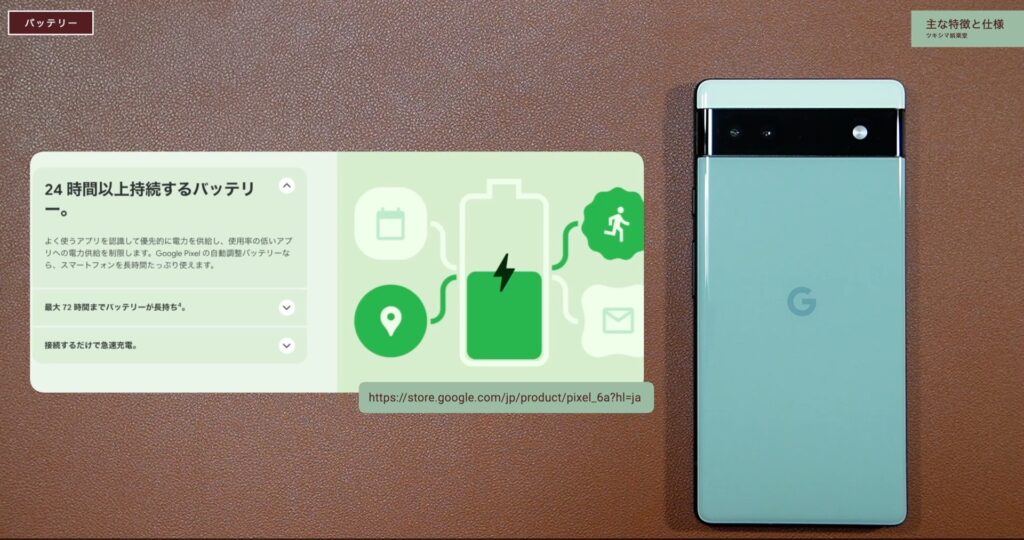
バッテリー
急速充電に対応しています。
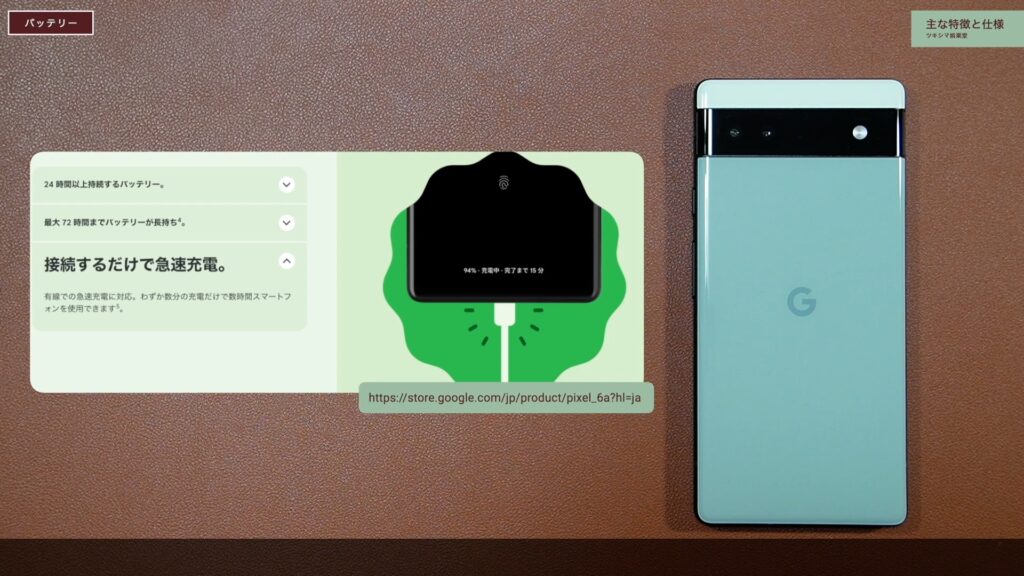
また公式ホームページでは、バッテリーは24時間以上持続すると記載されています。
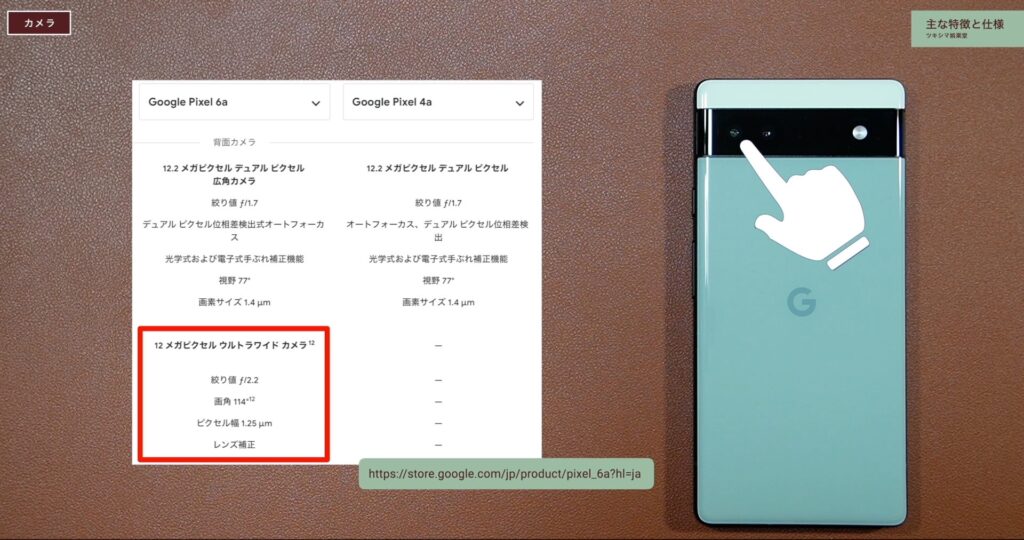
カメラ
カメラの画素数は12MPで、メインカメラは旧モデルの「Pixel 4a」と同じです。
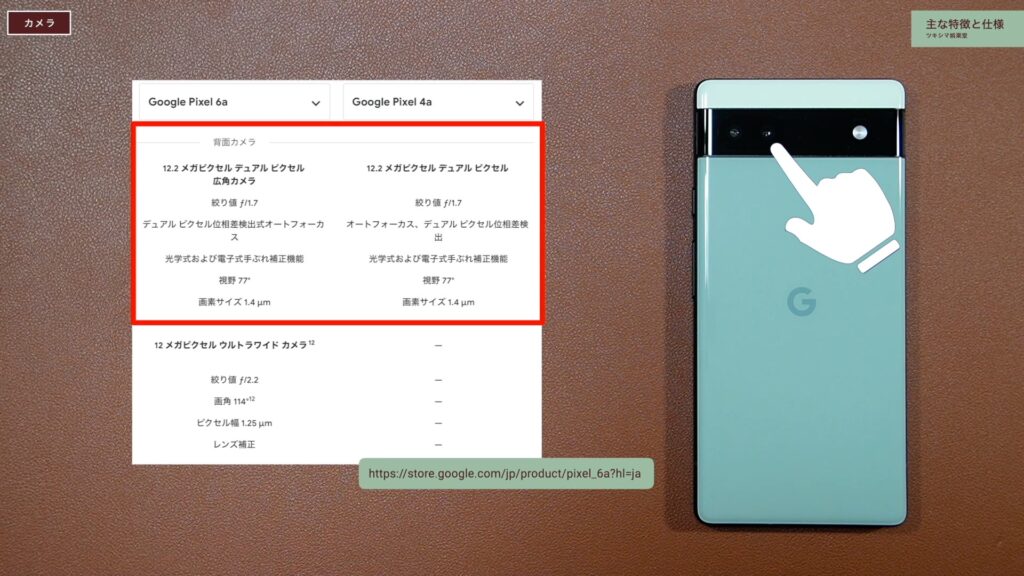
「Pixel 6a」は、これに超広角レンズが追加されたものになります。
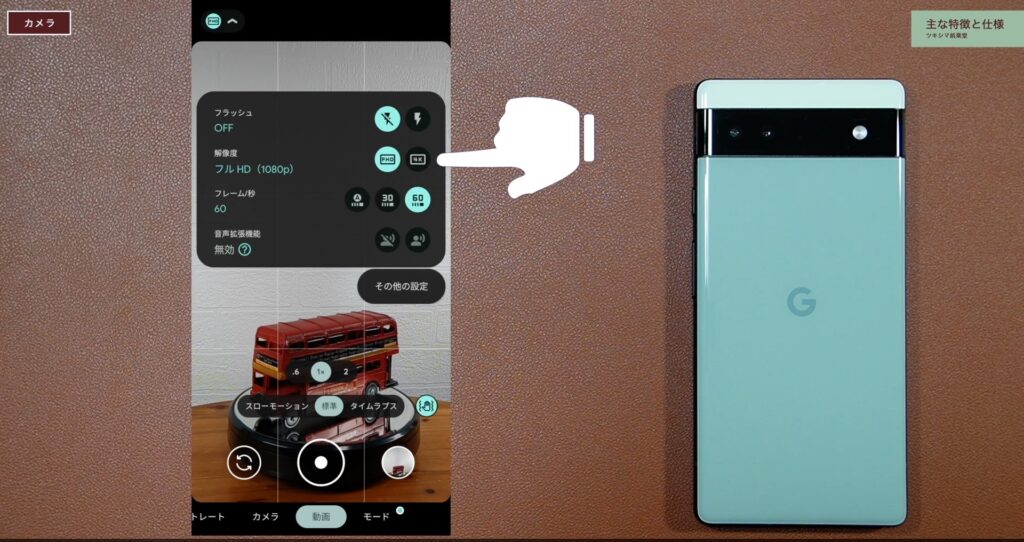
動画は、「フルHD」と「4K撮影」が可能です。
特徴的な機能として、「消しゴムマジック」があります。
その他の主な仕様
- 有機ELディスプレイ(リフレッシュレート60Hz)
- メモリー6GB
- ストレージ128GB
- メモリーカード使用不可
- 重さ178g
ツキシマ
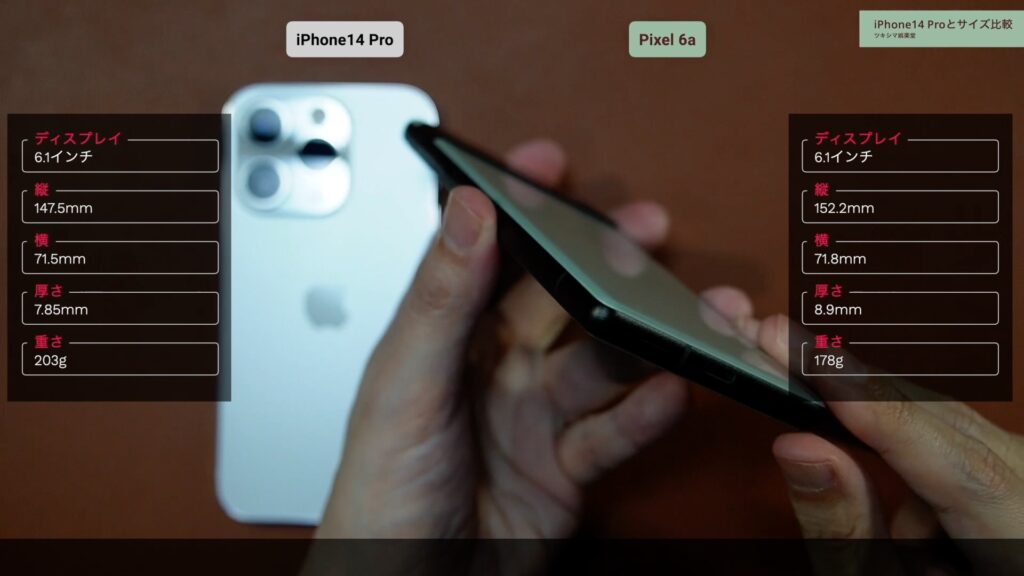
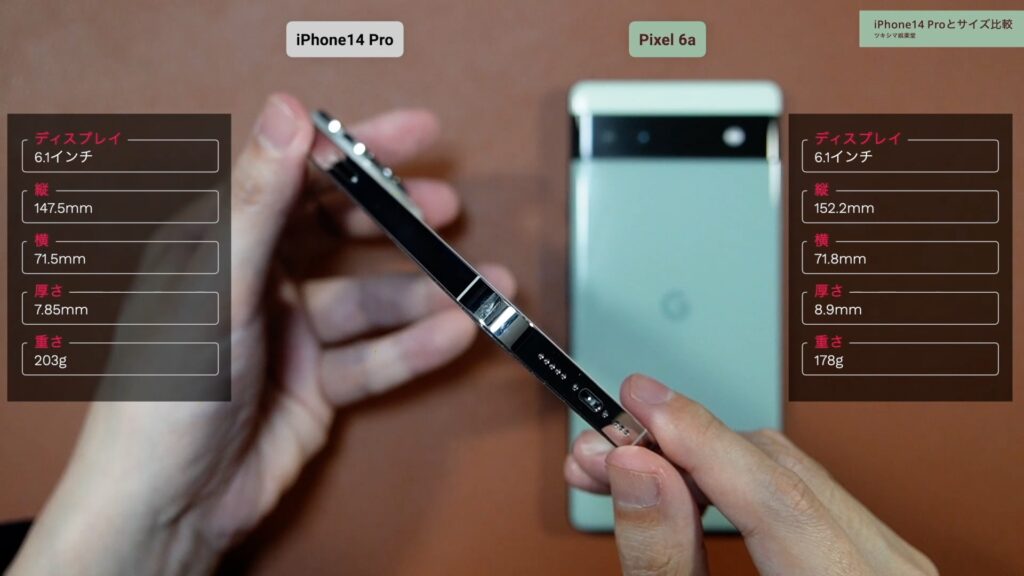
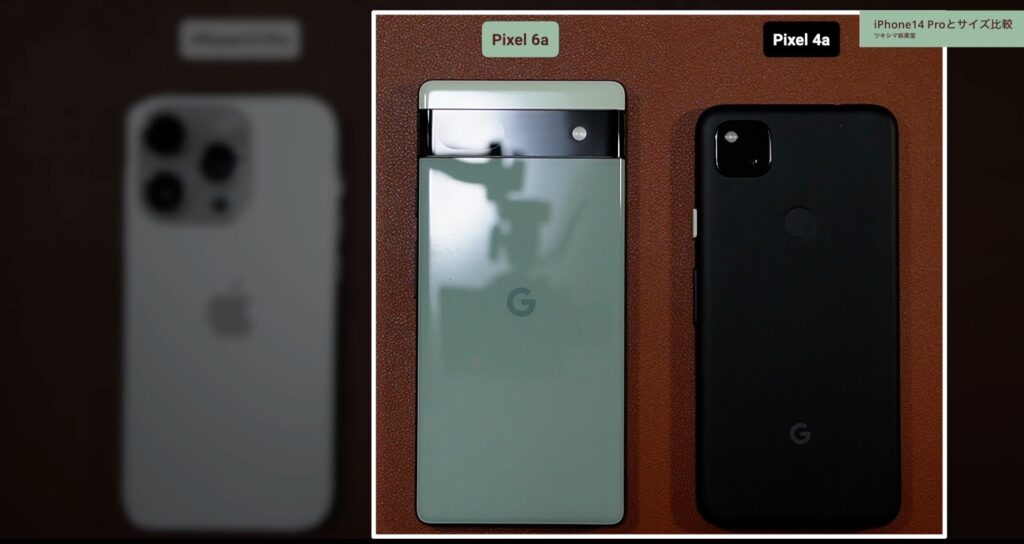
次は、iPhone14 Proとサイズ比較してみたいと思います。
iPhone14 Proとサイズ比較
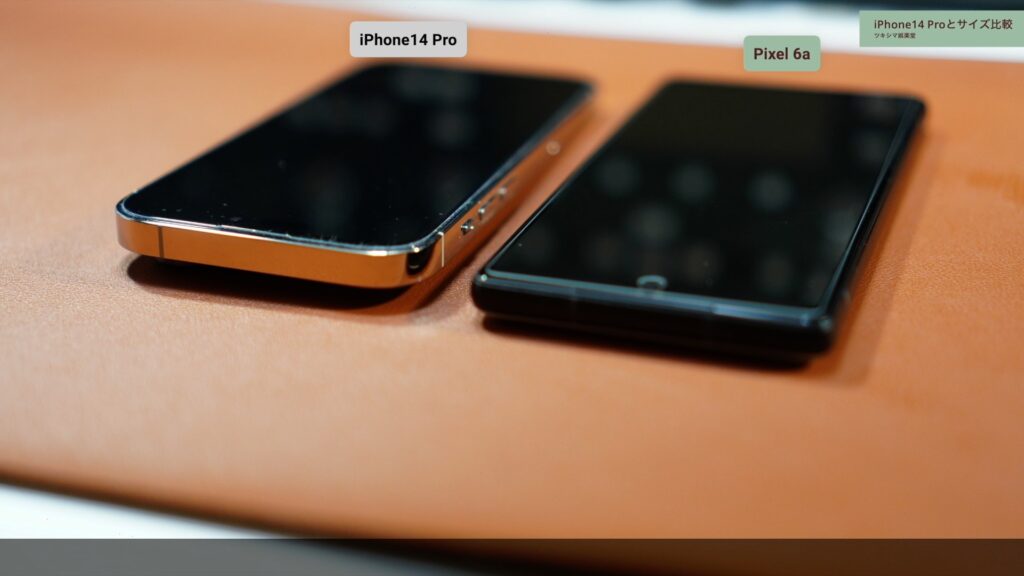
「iPhone14 Pro」と並べてみました。
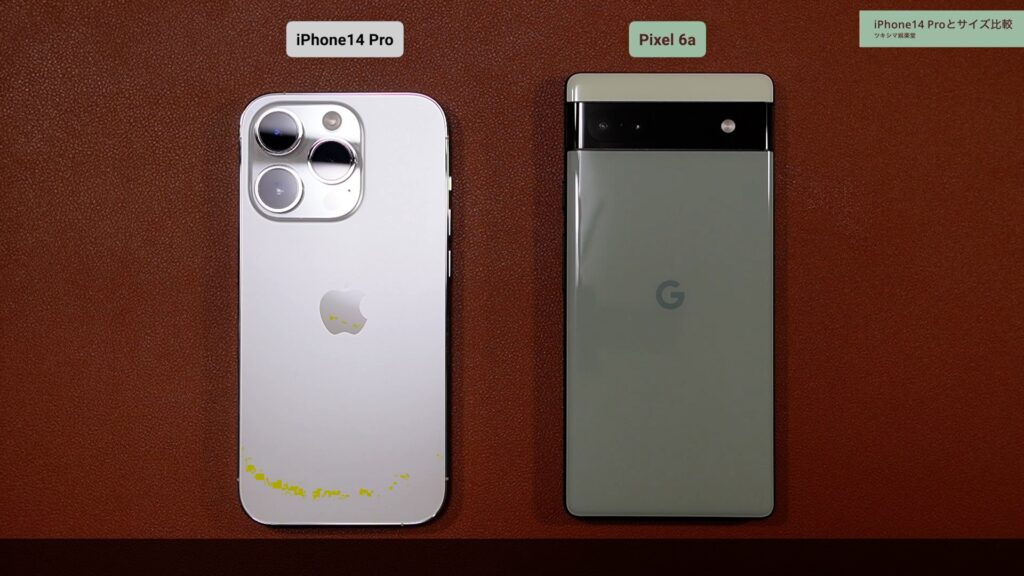
公式ホームページによると、ディスプレイサイズは同じ「6.1インチ」ですが、縦と横のサイズには違いがあるようです。
| 項目 | iPhone14 Pro | Pixel 6a |
|---|---|---|
| ディスプレイ | 6.1インチ | 6.1インチ |
| 縦 | 147.5mm | 152.2mm |
| 横 | 71.5mm | 71.8mm |
| 厚さ | 7.85mm | 8.9mm |
| 重さ | 203g | 178g |
厚みは「約1mm」ほど「Pixel 6a」の方が厚いです。
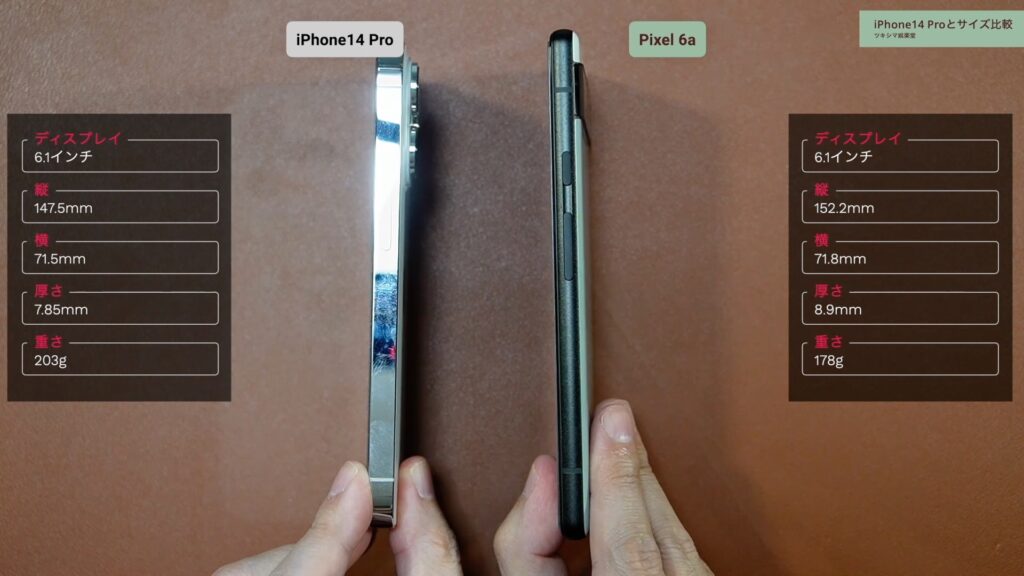
ただ、「Pixel 6a」はサイド部分が丸くなっているために、むしろ薄く感じて持ち易いです。
次は、「Pixel 4a」も並べて比較してみたいと思います。「Pixel 4a」のディスプレイサイズは「5.8インチ」です。
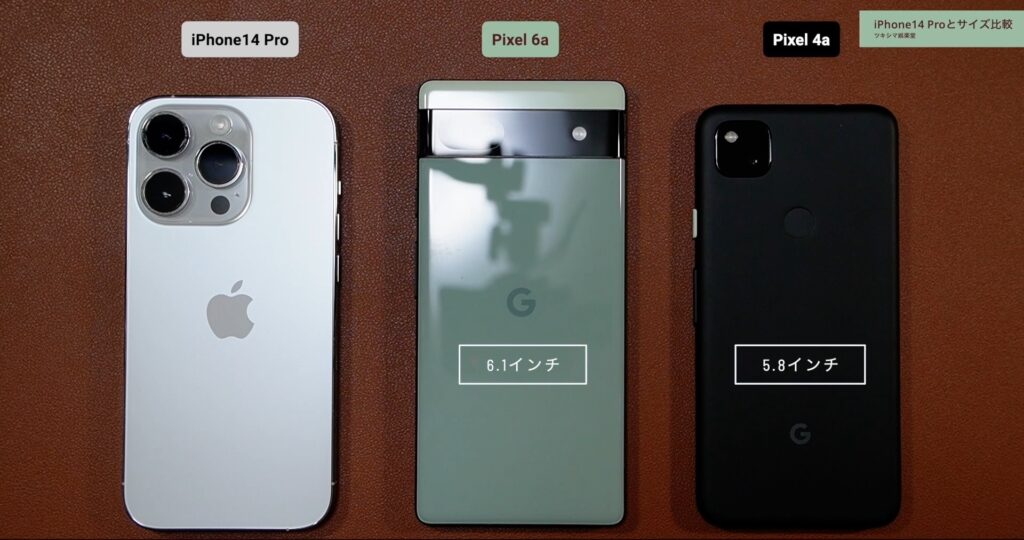
「Pixel 6a」は、スマホ本体のデザインが大きく変わりました。
カメラ部分の出っ張りは、普段「iPhone14 Pro」を見ているせいか、購入前に画像で見て想像していた程には気になりませんでした。
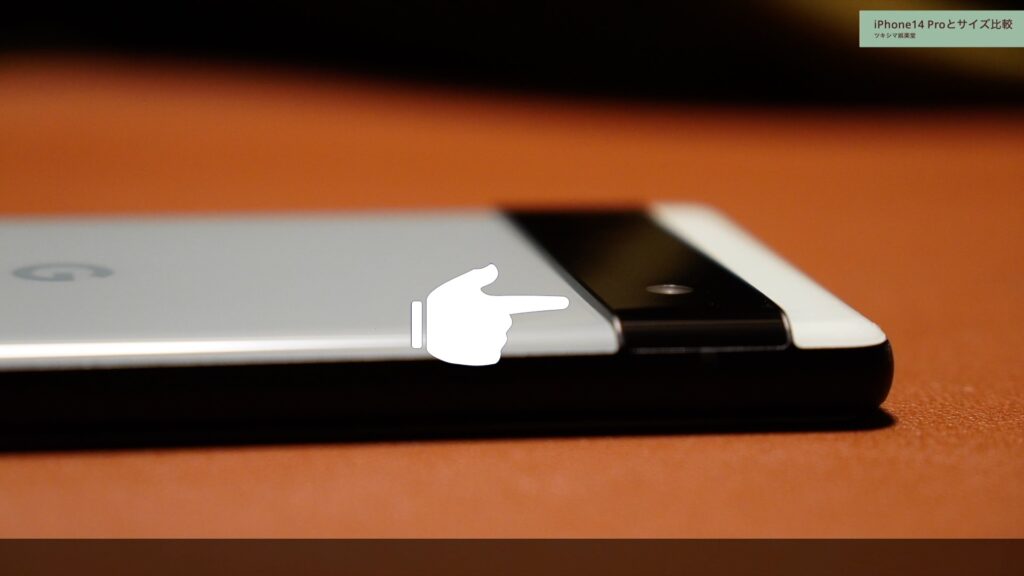
カメラ部分を下にして置いてみたところも、比べてみると「iPhone」よりは全然傾きは少ないです。
ツキシマ
次は、数日使用してみて気になったところをみていきたいと思います。
数日使用して気になったところ
良い点
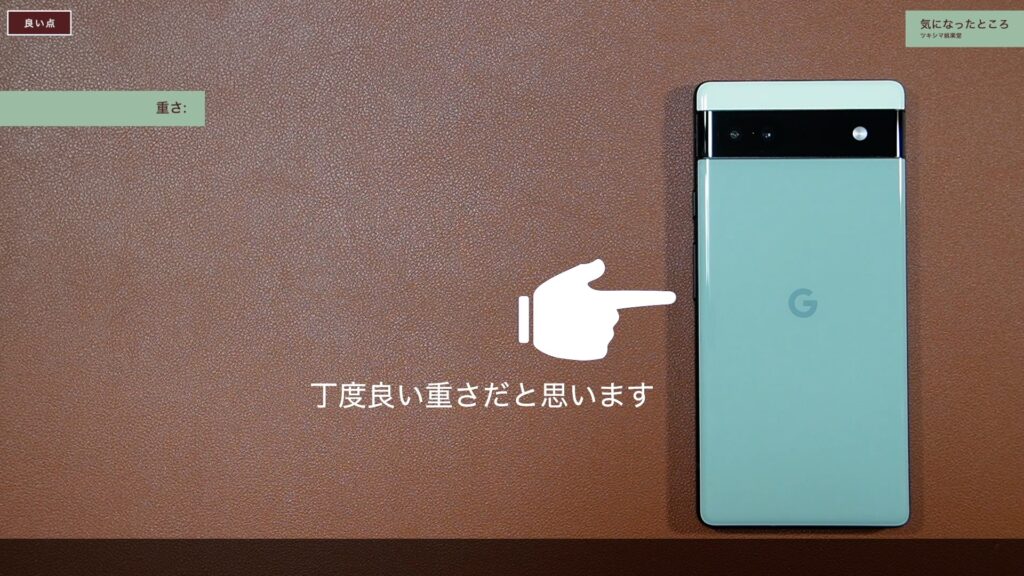
1.重さ
「Pixel 6a」の重さは「178g」で、ディスプレイサイズの同じ「iPhone14 Pro」より「約30g」ほど軽いです。実際、手に持ってみると丁度良い重さだと思います。
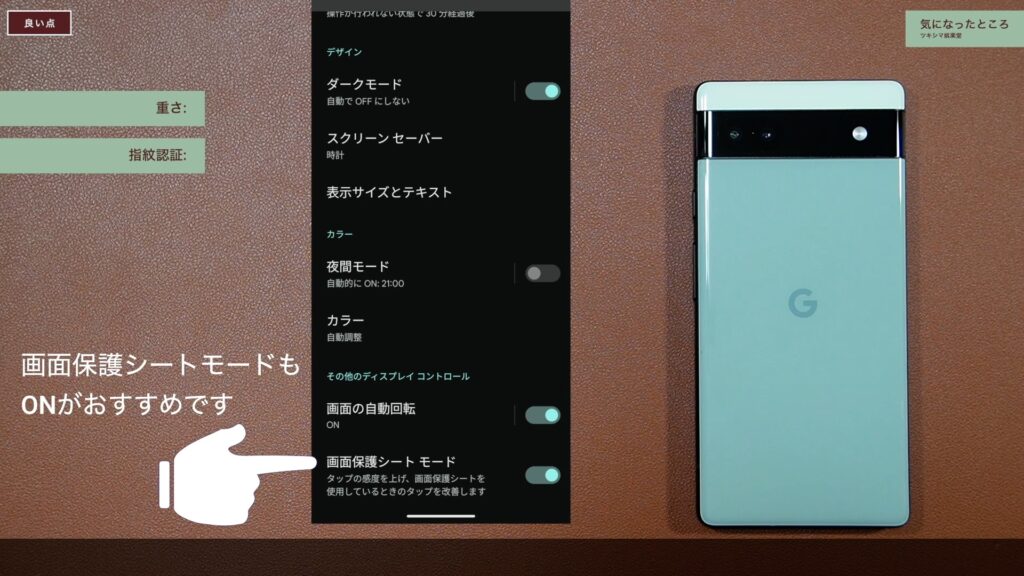
2.指紋認証
数日使用してみましたが、指紋認証は特に不満も無く使用できています。
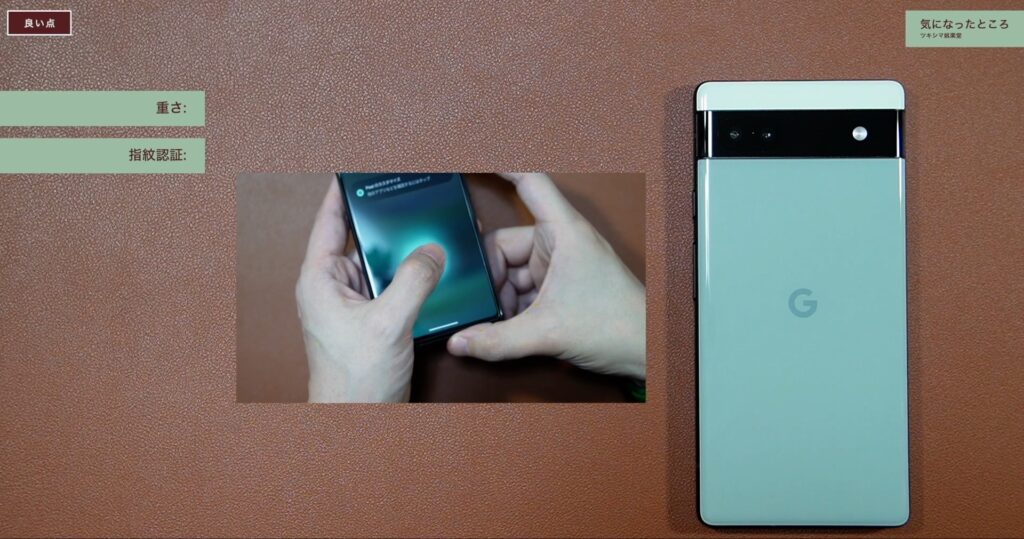
感度を良くするために、液晶保護ガラスを貼り付けた後に指紋認証の設定をしました。そのほうが反応が良いようです。そして、「画面保護シートモード」という設定もありますのでONにすることがおすすめです。
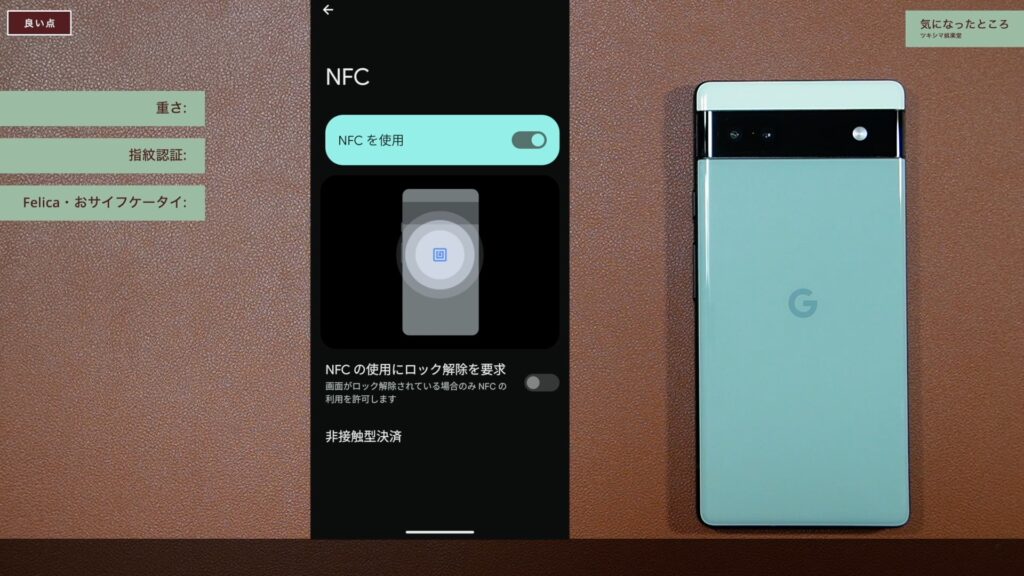
3.Felica・おサイフケータイ機能
Felicaに対応しています。
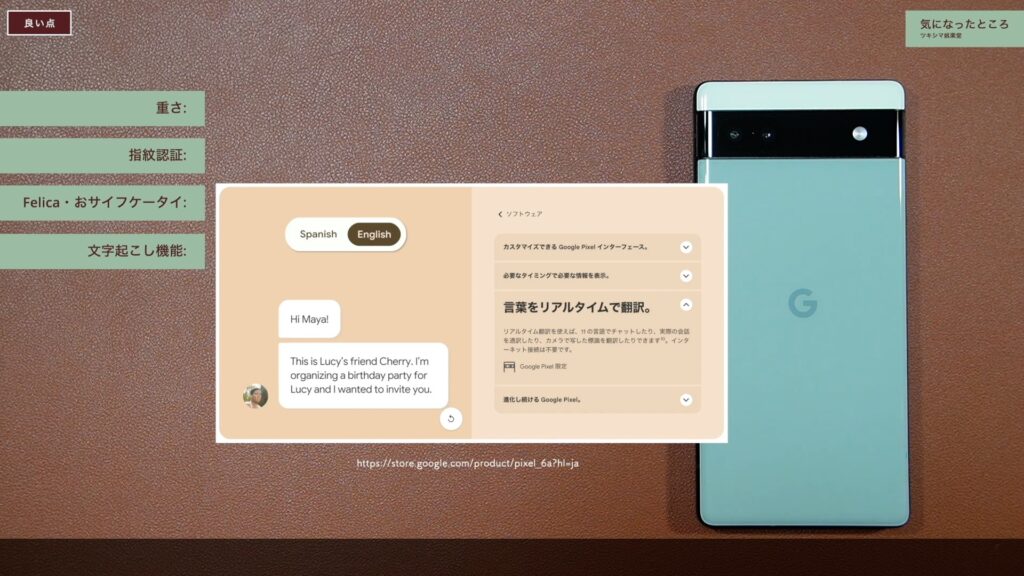
4.文字起こし機能
リアルタイムに文字起こしが可能です。この機能があれば海外のレビュー動画などで、翻訳機として使用することが出来ます。
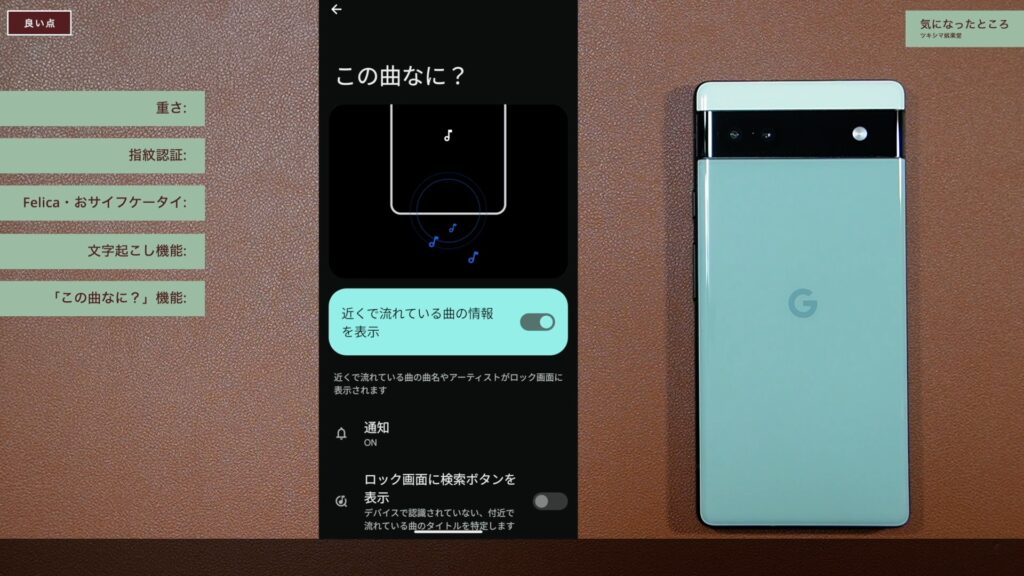
5.「この曲なに?」機能
使用してみると意外と楽しい機能です。知らない曲を調べることが出来ます。
- 重さ
- 指紋認証
- Felica・おサイフケータイ機能
- 文字起こし機能
- 「この曲なに?」機能
気になる点
・ワイヤレス充電
上位モデルの「Pixel 7 Pro」はワイヤレス充電が可能ですが、「Pixel 6a」はワイヤレス充電は出来ません。
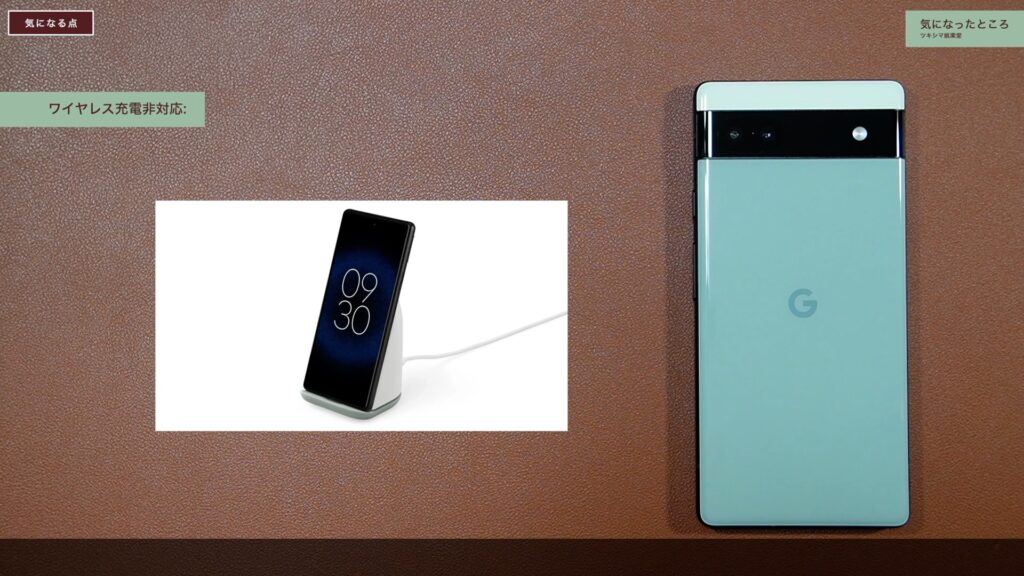
今のところ気になっている点は、この1つのみです。
ツキシマ
次は、カメラアプリの使い方をみていきたいと思います。
カメラアプリの使い方
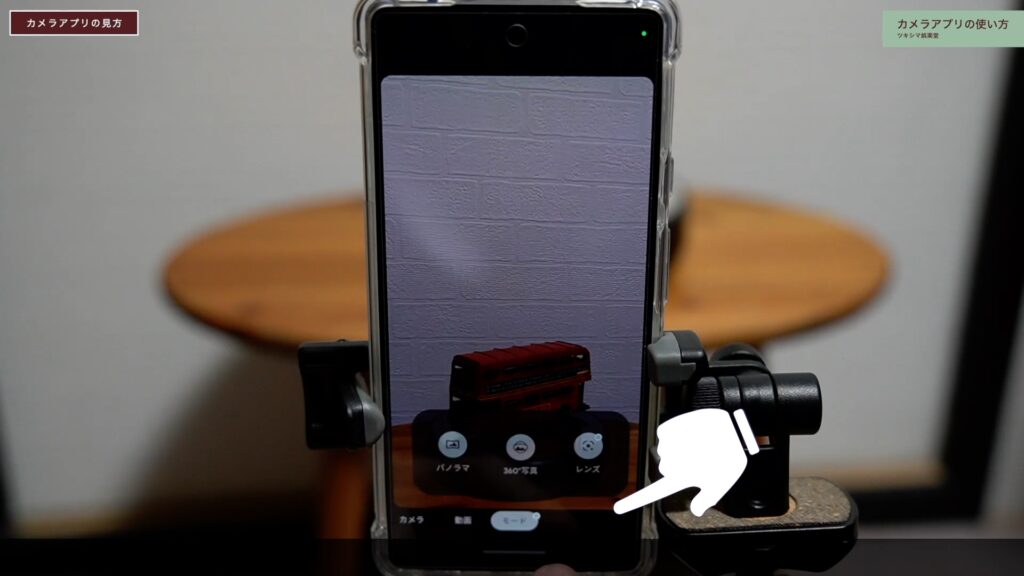
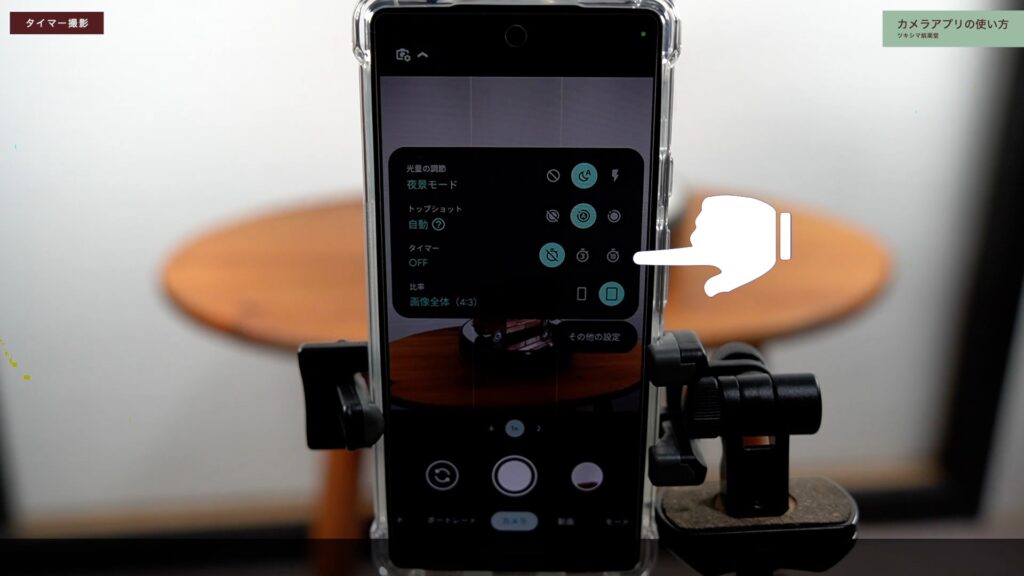
カメラの画面解説
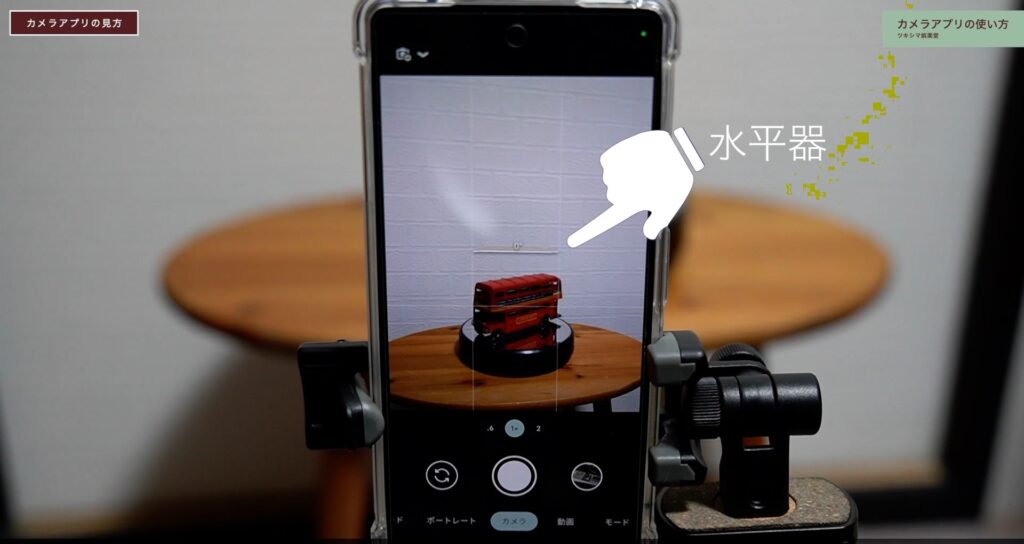
下の画像は、カメラアプリを立ち上げた画面です。中央に水平器が表示されます。
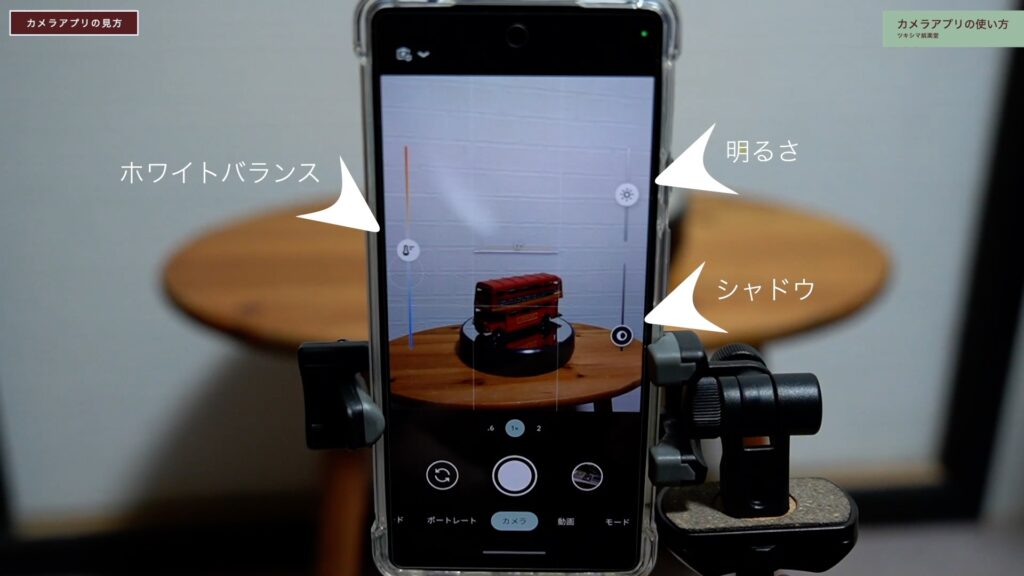
画面をタップすると、「ホワイトバランス」や「露出」を操作できます。
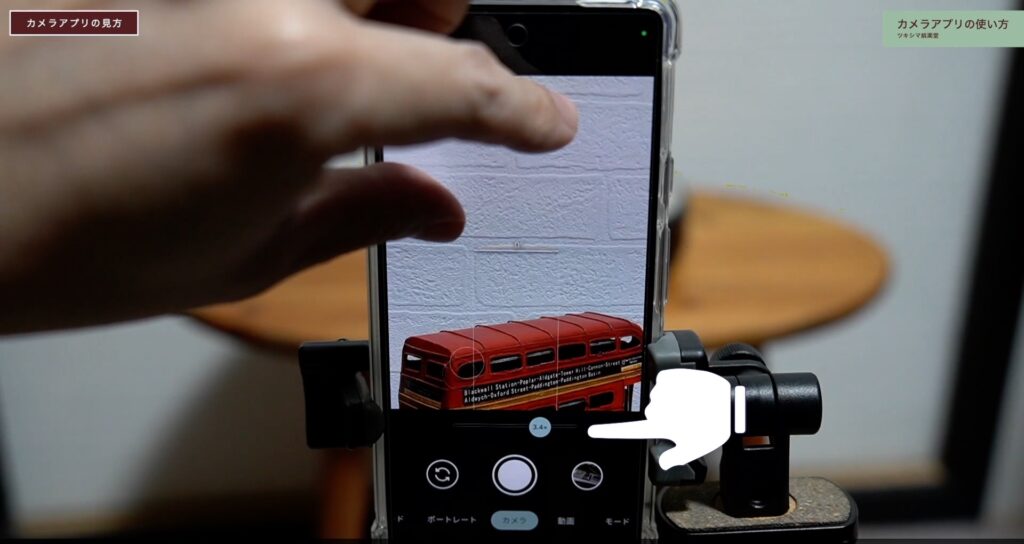
中央下の3つの数字は、タップすることで「広角・標準・望遠」の3種類の画角を選択できます。
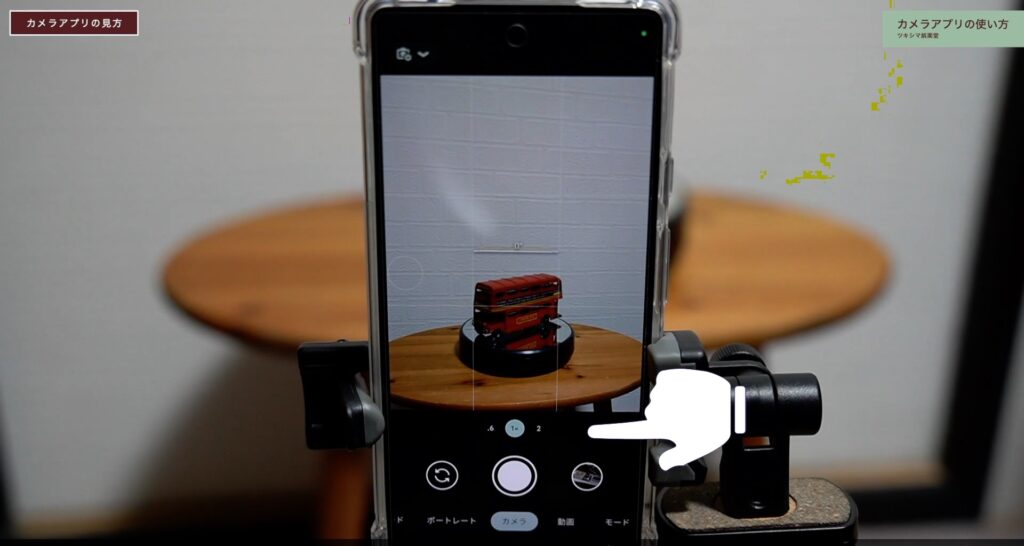
また、画面を「ピンチイン・ピンチアウト」することで、シームレスに画角を決めることも出来ます。
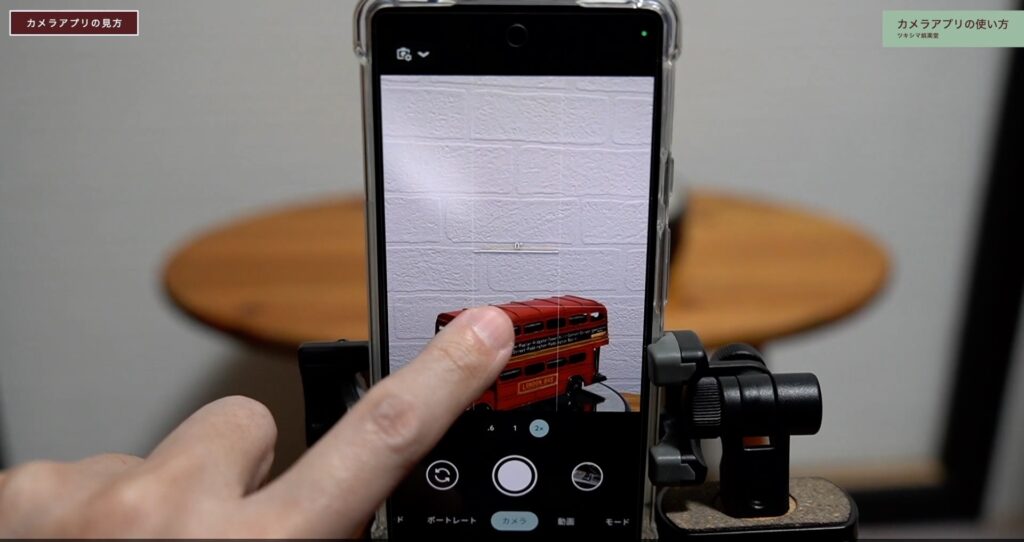
また、ピントを合わせたい場所をタップすると白い丸が現れて、そこにピントを合わせることが出来ます。丸い部分をもう一度タップすると、ピントを解除することが出来ます。
その下は、左から「インカメラとアウトカメラの切り替えボタン」「シャッターボタン」「写真フォルダへのリンクボタン」です。
その下は、撮影モードを切り替えるボタンです。「カメラ」や「動画」「ポートレート」など、様々なモードを選択できます。
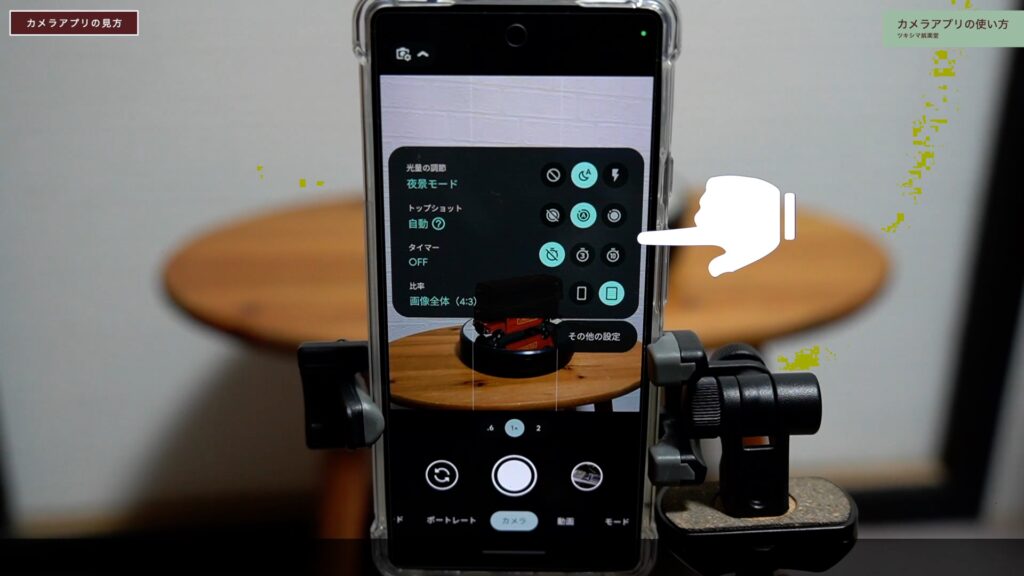
左上に、カメラアプリの設定が出来るボタンがあります。タップすると、まず「4つ」選択できる項目が表示されます。「光量の調節」や「タイマー」「比率」などです。
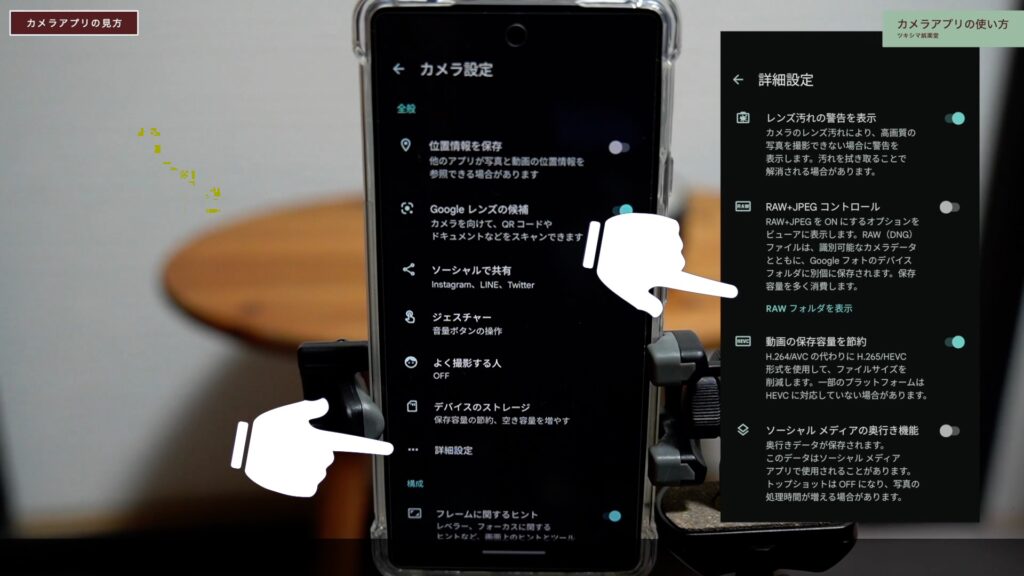
「その他の設定」をタップすると、さらに多くの項目を選択できます。「詳細設定」で「RAW」の選択。動画の保存容量などを決められます。
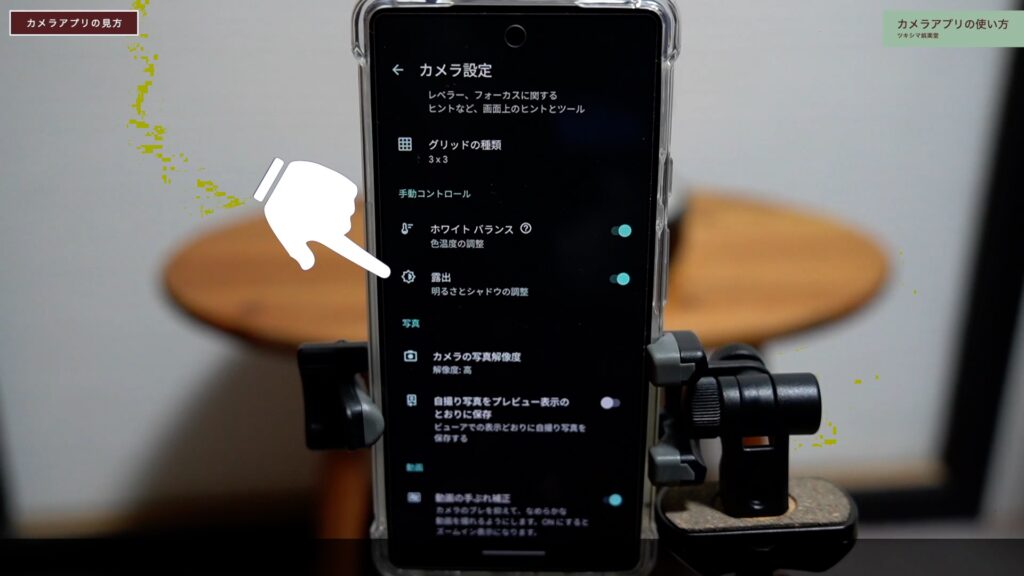
他に、「グリッドの設定」や「ホワイトバランス」「露出」などの設定。「手振れ補正」の設定などがあります。
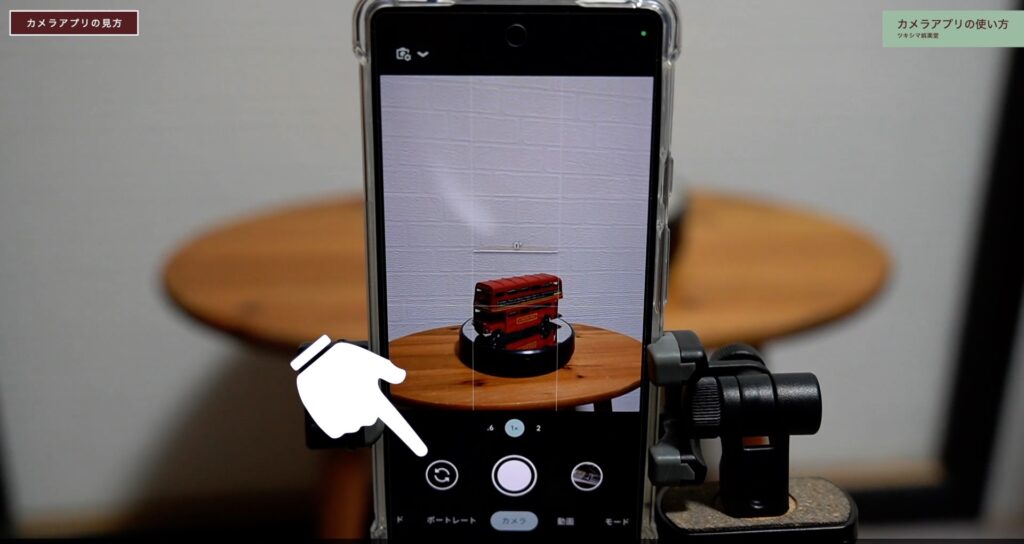
写真の撮影
同じ位置から写真を撮影すると、以下の画像のような感じです。
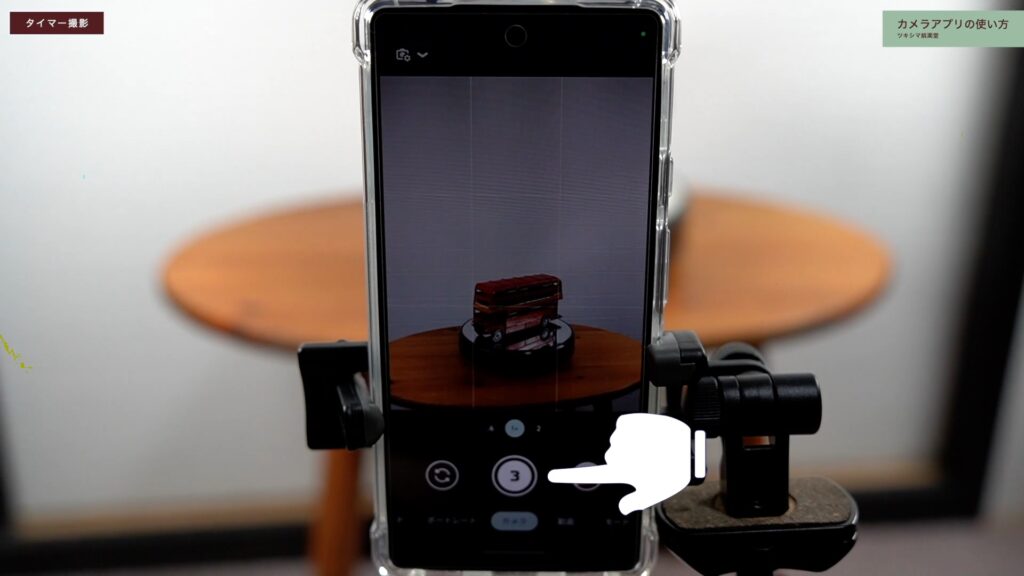
タイマー撮影
左上の設定からタイマーを選びます。「3秒」と「10秒」が選択可能です。
シャッターボタンに「3」という数字が追加されました。
動画の撮影
モードを動画に切り替えます。「スローモーション・標準・タイムラプス」が選択できます。
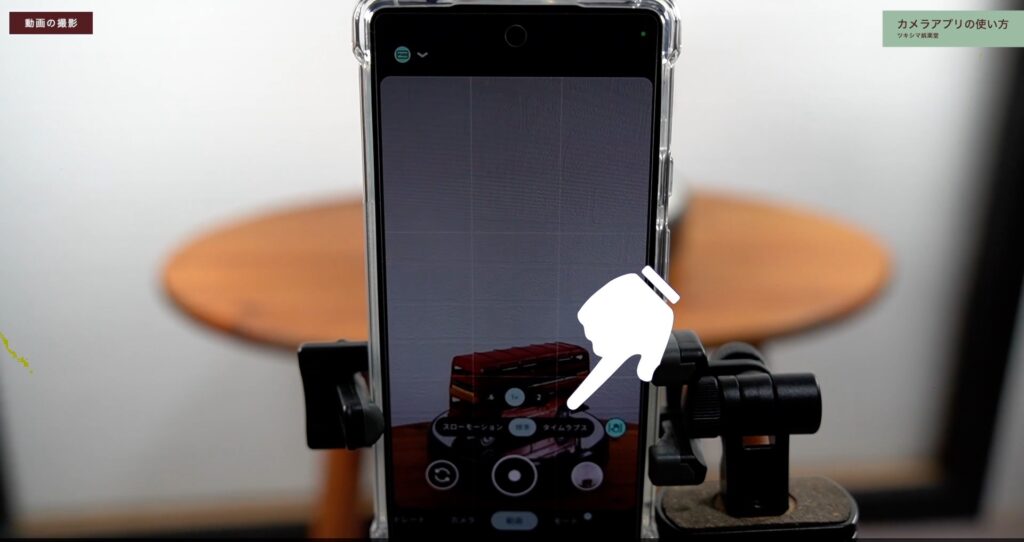
また、左上の設定を開くと「解像度」や「フレームレート」を選択できます。諸々選択できましたら録画開始ボタンを押します。

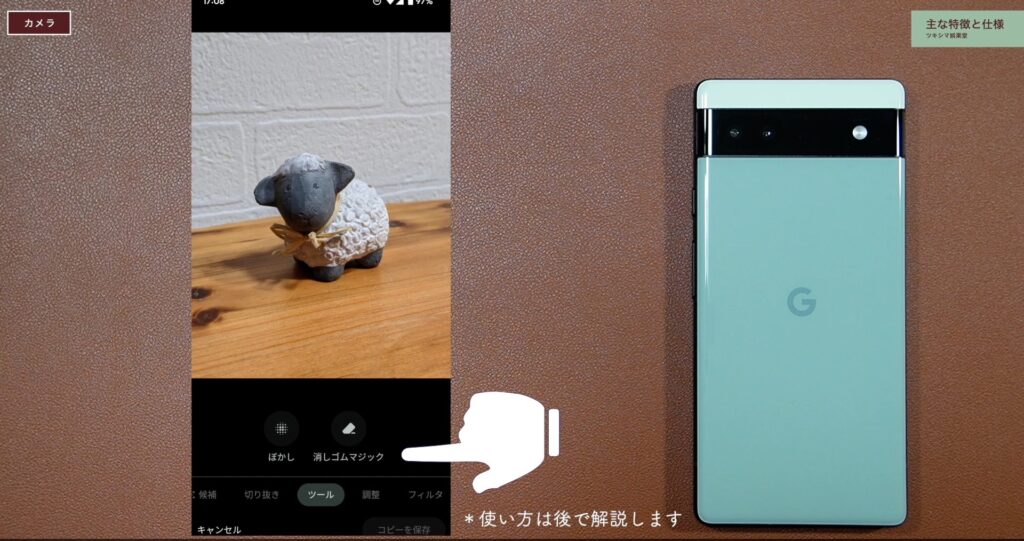
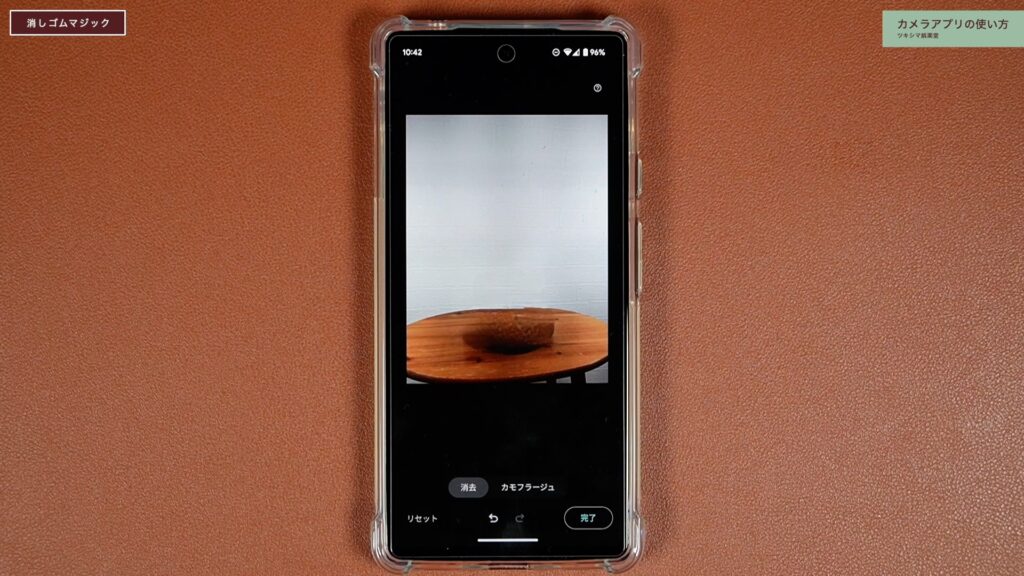
消しゴムマジック
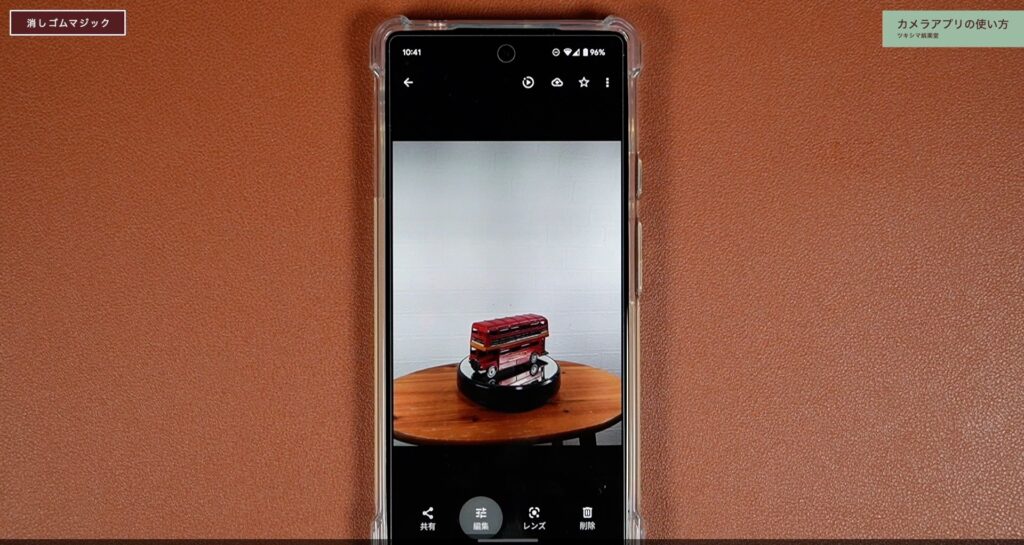
消しゴムマジックは、撮影した画像を表示して画面下の「編集」をタップします。
「ツール」を選択してから、「消しゴムマジック」を選択します。
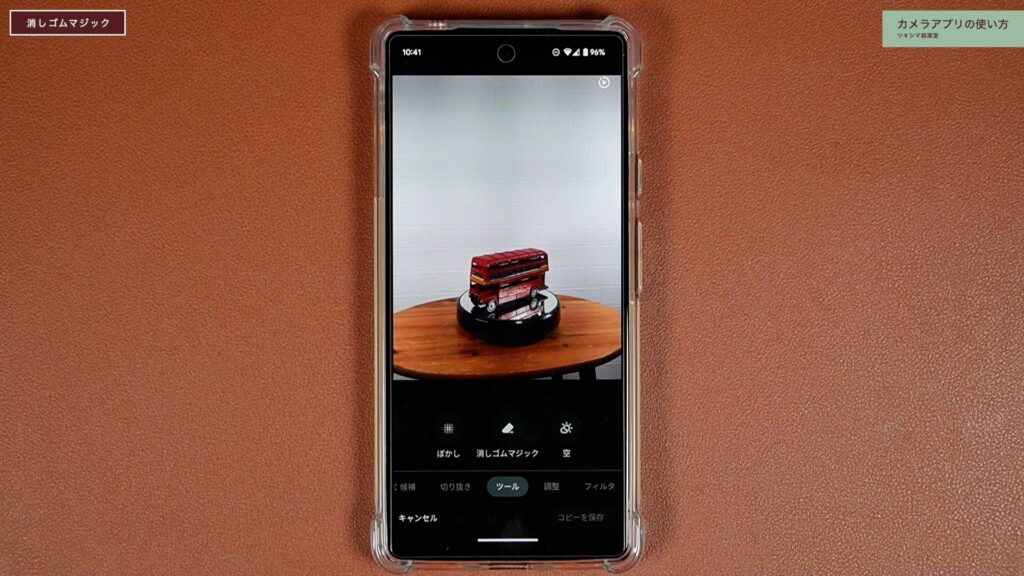
消去したいものを「円」でなぞります。
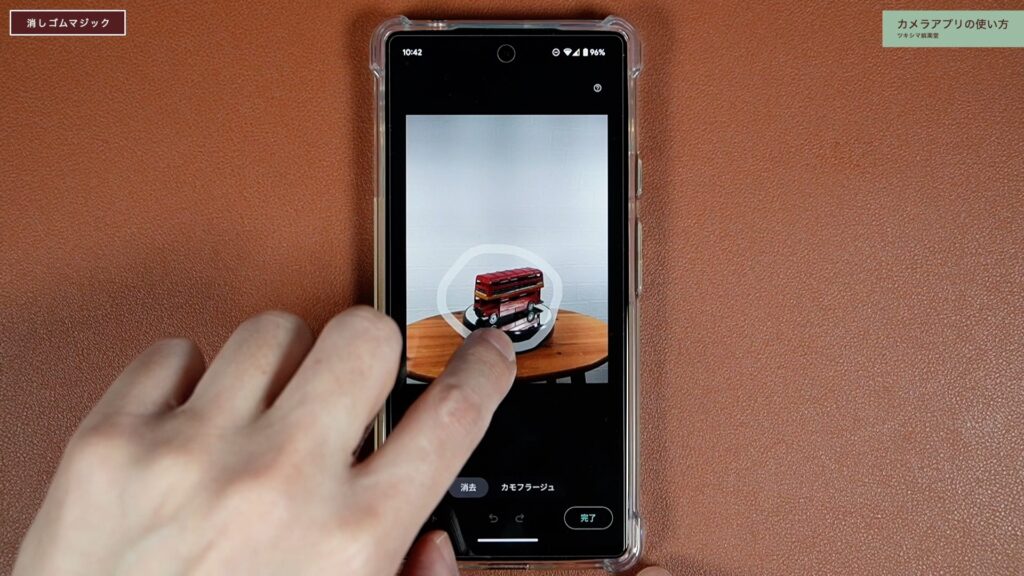
上手く消えましたら「完了」をタップして保存します。やり直したい場合は、「リセット」を押します。
ツキシマ
次は、まとめと次回予告です。
まとめと次回予告
まとめ
販売価格からみてみると、Pixel 6aは、非常にコストパフォーマンスの高いスマートフォンだと思います。6.1インチのディスプレイは見易いですし、その他の各性能も必要十分な機能を備えています。また、端末本体のデザインやカラーも私は良いと思います。
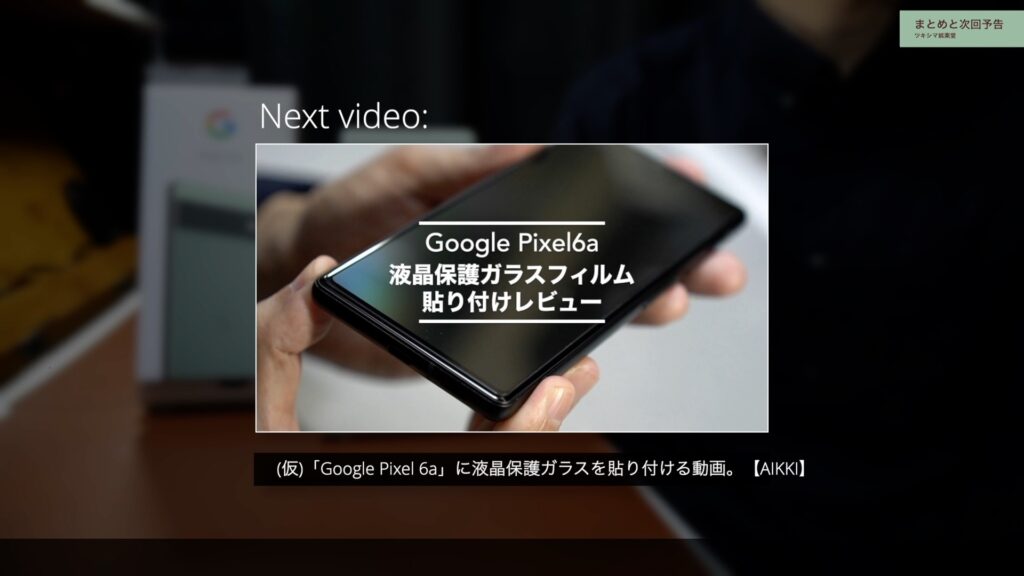
次回予告
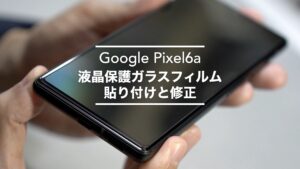
次回の娯楽堂では、「Pixel 6a」用に購入した液晶保護ガラスを貼り付けたり、失敗して入ってしまった空気を修正する様子を動画にしました。
また次回の動画やブログ記事を観て頂けたら嬉しいです。
次回のブログ記事↓
ツキシマ
それでは、最後までご視聴ありがとうございました。